Open index.js (in your case it may be app.js or server.js) and set the request header
var express = require('express');
var app = express();
...
...

//CORS support settings
app.use(function(req, res, next){
    res.header('Access-Control-Allow-Origin', '*');
    res.header('Access-Control-Allow-Headers', 'Origin, X-Requested-With, Content-Type, Accept');
    res.header('Access-Control-Allow-Methods', 'GET,PUT,POST,DELETE');
    next();
});


...

....

app.get('/', (req, res) => {
    res.sendFile(__dirname + '/index.html');
});

app.use('/api/user', user);

...
Move the rout definition from the index.js or app.js
Folder structure
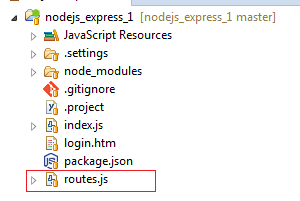
index.js file
var express = require('express');
var app = express();

app.use(express.static('public'));

//Routes
app.use(require('./routes'));  //http://127.0.0.1:8000/    http://127.0.0.1:8000/about

//app.use("/user",require('./routes'));  //http://127.0.0.1:8000/user  http://127.0.0.1:8000/user/about

//you can create more routs
//app.use("/admin",require('./adminroutes')); //http://127.0.0.1:8000/admin http://127.0.0.1:8000/admin/about

var server = app.listen(8000, function () {

  var host = server.address().address
  var port = server.address().port

  console.log("Example app listening at http://%s:%s", host, port)

})
routes.js
var express = require('express');
var router = express.Router();

//Middle ware that is specific to this router
router.use(function timeLog(req, res, next) {
  console.log('Time: ', Date.now());
  next();
});


// Define the home page route
router.get('/', function(req, res) {
  res.send('home page');
});

// Define the about route
router.get('/about', function(req, res) {
  res.send('About us');
});


module.exports = router;
you can add more routs like admin routs (*i am not added this in my project so it will not see int the above folder structure)
adminroutes.js
var express = require('express');
var router = express.Router();

//Middle ware that is specific to this router
router.use(function timeLog(req, res, next) {
  console.log('Time: ', Date.now());
  next();
});


// Define the home page route
router.get('/', function(req, res) {
  res.send('Admin dash board');
});

// Define the about route
router.get('/profile', function(req, res) {
  res.send('About profile');
});


module.exports = router;
Installing Express with nodejs project dependency
4. Now install Express in the app directory and save it in the dependencies list using :- npm install express --save (To install Express temporarily and not add it to the dependencies list, omit the --save option)
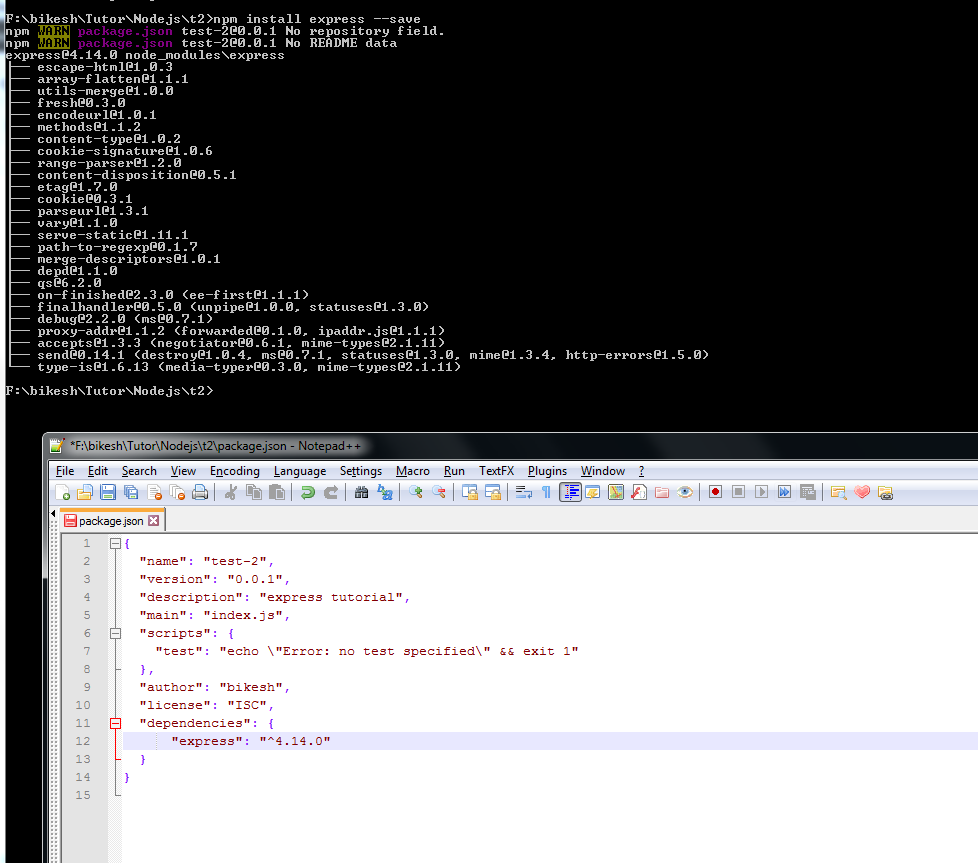
you can see the express is added to the project dependency
5. You can install the following supporting libraries also
npm install body-parser --save

npm install cookie-parser --save

npm install multer --save
body-parser – This is a node.js middleware for handling JSON, Raw, Text and URL encoded form data.
cookie-parser – Parse Cookie header and populate req.cookies with an object keyed by the cookie names.
multer – This is a node.js middleware for handling multipart/form-data.
6. Create a sample code
var express = require('express');
var app = express();

app.get('/', function (req, res) {
   res.send('Hello World');
});

var server = app.listen(8000, function () {

  var host = server.address().address
  var port = server.address().port

  console.log("Server started and listening at http://%s:%s", host, port)

});
7 Run the server using node index.js open http://127.0.0.1:8000/ in your browser
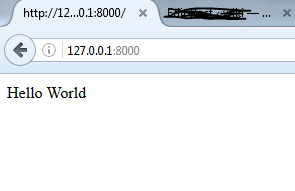
Done
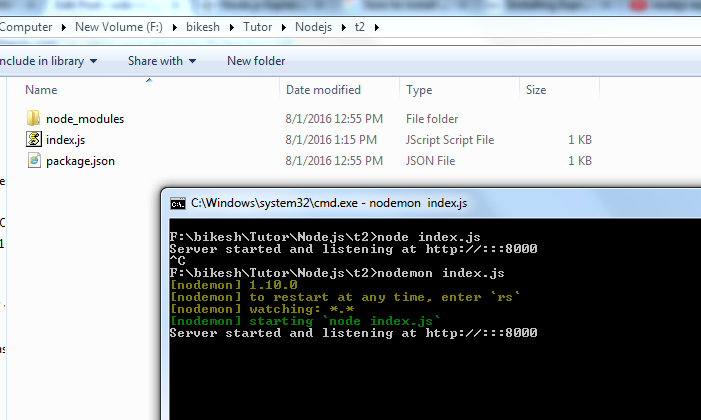
There a node package nodemon, “Nodemon is a utility that will monitor for any changes in your source and automatically restart your server. Perfect for development”
npm install -g nodemon
Running our project with nodemon
nodemon index.js
How to use express generator for creating project https://wiki.workassis.com/nodejs-express-application-generator/
You will get the single installation package for Nodejs and NPM from the node website nodejs.org.
For testing the installation open command prompt
node -v
If it is showing node version then the NodeJs installation success
For testing npm installation use
npm -v
For a simple program
create a test.js file put some log and run this file from command prompt using node (node <filename.js>)
console.log('Welcome to Node programming');
node test.js
String objects are immutable ( once created can not be changed ) and it will stored in the Constant String Pool , so if you chose to do a lot of manipulations with String objects, you will end up with a lot of abandoned String objects in the String pool. To avoiding this memory loss we can use StringBuilder or StringBuffer and can be modified over and over again without causing memory loss
StringBuffers are thread-safe, they have synchronized methods to control access so that only one thread can access a StringBuffer object’s synchronized code at a time. Thus, StringBuffer objects are generally safe to use in a multi-threaded environment where multiple threads may be trying to access the same StringBuffer object at the same time.
        String from = "From : ";
        String to = " To : ";

        StringBuilder builder = new StringBuilder();
        builder.append(from);
        builder.append("Manager");
        builder.append(to);
        builder.append("Developer");

        Log.i("Result : ", builder.toString());
StringBuilder’s access is not synchronized so that it is not thread-safe. The performance of StringBuilder can be better than StringBuffer. Thus, if you are working in a single-threaded environment, using StringBuilder instead of StringBuffer may result in increased performance.
        String from = "From : ";
        String to = " To : ";

        String str = new StringBuffer()
                .append(from)
                .append("Manager")
                .append(to)
                .append("Developer")
                .toString();


        Log.i("Result : ",str);
ref:
https://docs.oracle.com/javase/7/docs/api/java/lang/StringBuilder.html
https://docs.oracle.com/javase/tutorial/java/data/buffers.html
https://docs.oracle.com/javase/7/docs/api/java/lang/StringBuffer.html
In Android we can set click listener by three ways
<?xml version="1.0" encoding="utf-8"?>
<LinearLayout xmlns:android="http://schemas.android.com/apk/res/android"
    xmlns:tools="http://schemas.android.com/tools"
    android:layout_width="match_parent"
    android:layout_height="match_parent"
    android:orientation="vertical"
    android:paddingBottom="@dimen/activity_vertical_margin"
    android:paddingLeft="@dimen/activity_horizontal_margin"
    android:paddingRight="@dimen/activity_horizontal_margin"
    android:paddingTop="@dimen/activity_vertical_margin"
    tools:context="com.example.bm.buttonclickeg.MainActivity">

    <Button
        android:id="@+id/btn_one"
        android:layout_width="wrap_content"
        android:layout_height="wrap_content"
        android:text="Button 1" />

    <Button
        android:id="@+id/btn_two"
        android:layout_width="wrap_content"
        android:layout_height="wrap_content"
        android:text="Button 2" />

    <Button
        android:id="@+id/btn_three"
        android:layout_width="wrap_content"
        android:layout_height="wrap_content"
        android:onClick="myBtnClick"
        android:text="Button 3" />

</LinearLayout>
In the above example btn_three I have added a property android:onClick=”myBtnClick” myBtnClick is a function I have defined in activiy
package com.example.bm.buttonclickeg;

import android.os.Bundle;
import android.support.v7.app.AppCompatActivity;
import android.view.View;
import android.widget.Button;
import android.widget.Toast;

public class MainActivity extends AppCompatActivity implements View.OnClickListener {

    @Override
    protected void onCreate(Bundle savedInstanceState) {
        super.onCreate(savedInstanceState);
        setContentView(R.layout.activity_main);

        //option 1

        Button btn1 = (Button) findViewById(R.id.btn_one);

        btn1.setOnClickListener(new View.OnClickListener() {
            @Override
            public void onClick(View view) {

                Toast.makeText(MainActivity.this, "Created individual click listener", Toast.LENGTH_SHORT).show();
            }
        });


        //option 2
        Button btn2 = (Button) findViewById(R.id.btn_two);

        btn2.setOnClickListener(this);

    }


    //option 2
    @Override
    public void onClick(View v) {

        switch (v.getId()) {
            case R.id.btn_two:
                Toast.makeText(MainActivity.this, "Implemented click listener in activity", Toast.LENGTH_SHORT).show();
                break;
        }

    }


    //option 3
    // This function I have added in the btn_tree xml
    public void myBtnClick(View v) {
        Toast.makeText(MainActivity.this, "Created a separate function for handling button click and added this function in button xml", Toast.LENGTH_SHORT).show();
    }
}